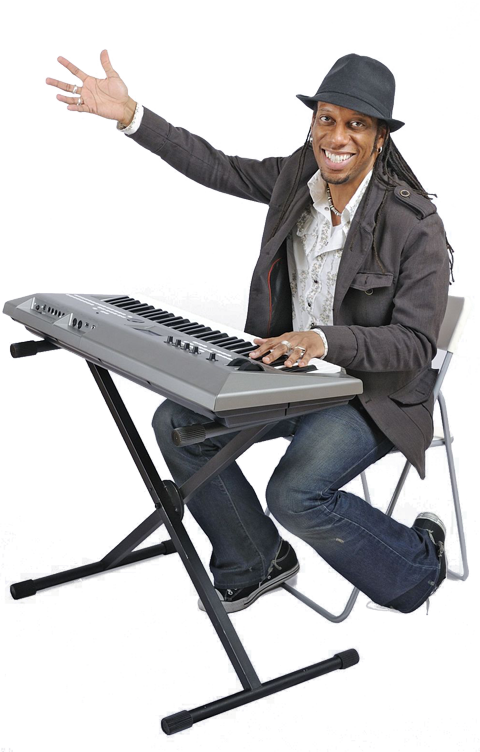
Preview Lesson #1 - Starting off...
1) Getting to know your piano or keyboard
There are 12 different notes on a piano and keyboard. The same 12 notes are repeated along the length of the keys. Starting at C, the diagram below shows the 12 notes repeated twice (2 octaves).

The 12 notes are called A Bb C C# D Eb E F F# G Ab
# = sharp (this means it is the note after the letter e.g. C#)
b = flat (this means it is the note before the letter e.g. Eb)
All black notes are either a # (sharp) or a b (flat) note.
On a Piano and Keyboard the notes from left to right start deep then get higher. Try this for yourself and notice the notes getting higher as you move from left to right.
2) What keys do i press?
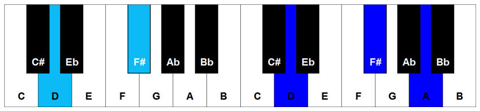
The diagram above shows a shape or a chord. To produce the chord you simply find and press the highlighted blue notes all at the same time.
At first it is best to practice towards the centre of the piano/keyboard. However, these shapes can be found in multiple places along the keys.
Play this chord in the centre of the piano/keyboard and then try finding it in different places. See how many times this chord appears.
3) Excercise
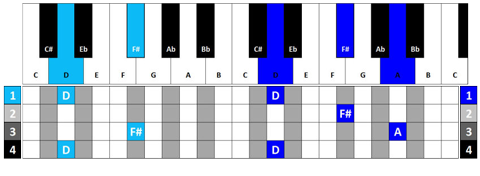
The diagram above shows a sequence of notes. Play the notes highlighted in the grid working from top to bottom one line at a time. If two or more notes appear on the line they are played at the same time. The numbers at the side help with timing (in most music we continually count from 1 to 4)
All the notes that are going to be played are highlighted on the keyboard at the top of the diagram.
Try giving this sequence of notes a go!
- At first play this sequence towards the centre of the piano/keyboard.
- Have a go with your right and left hand.
- When you feel confident with both hands, try playing the sequence starting in different locations along the keys.